
Showing posts with label frugal. Show all posts

08 July, 2014

Smoky Charcoal

 I was shopping at Walmart. 
Because when you live in a town not overrun with shopping centers, you get things at Walmart.
It's not all bad.

Anyway, on a whim, I wandered down the paint aisle, perusing the "oops paint". You know, the paint that got mixed and rejected by the customer, and gets marked waaay down, often 50% off.

Anyone have a guess as to what happened!?
Yup, I bought some.
It's by Glidden, called Smoky Charcoal.

You know, I could have more expensive hobbies. 
I could probably have simpler hobbies.
Mostly because my hobby is randomly redecorating things.

However, it was the basement bathroom. Poor, bland little bathroom.
I mean, look at it!


I thought the decor was cute, but I hated the wall color. 
Nothing very inspiring about tan.
This tan was particularly snore-inducing.


I already painted the bathroom once before, from a dark tan to a lighter tan.
So thrilling!

This transformation was a bit more distinct:

 Painting is pretty straightforward.
Put all the kids down for naps.
Tape all.the.things like a madwoman.
(Because it wouldn't be a whim without a time crunch.)
Rustle up a paintbrush and roller, and go like crazy!

(starting)

(during)


 And, the finished product!


Isn't it pretty??!!!
And for $12 oops paint, proof that one man's trash is another man's treasure.
 

(Yes, we do use indoor/outdoor Christmas lights in our shower. They are wired behind the shower wall, and turn on via remote. They are very cool.)
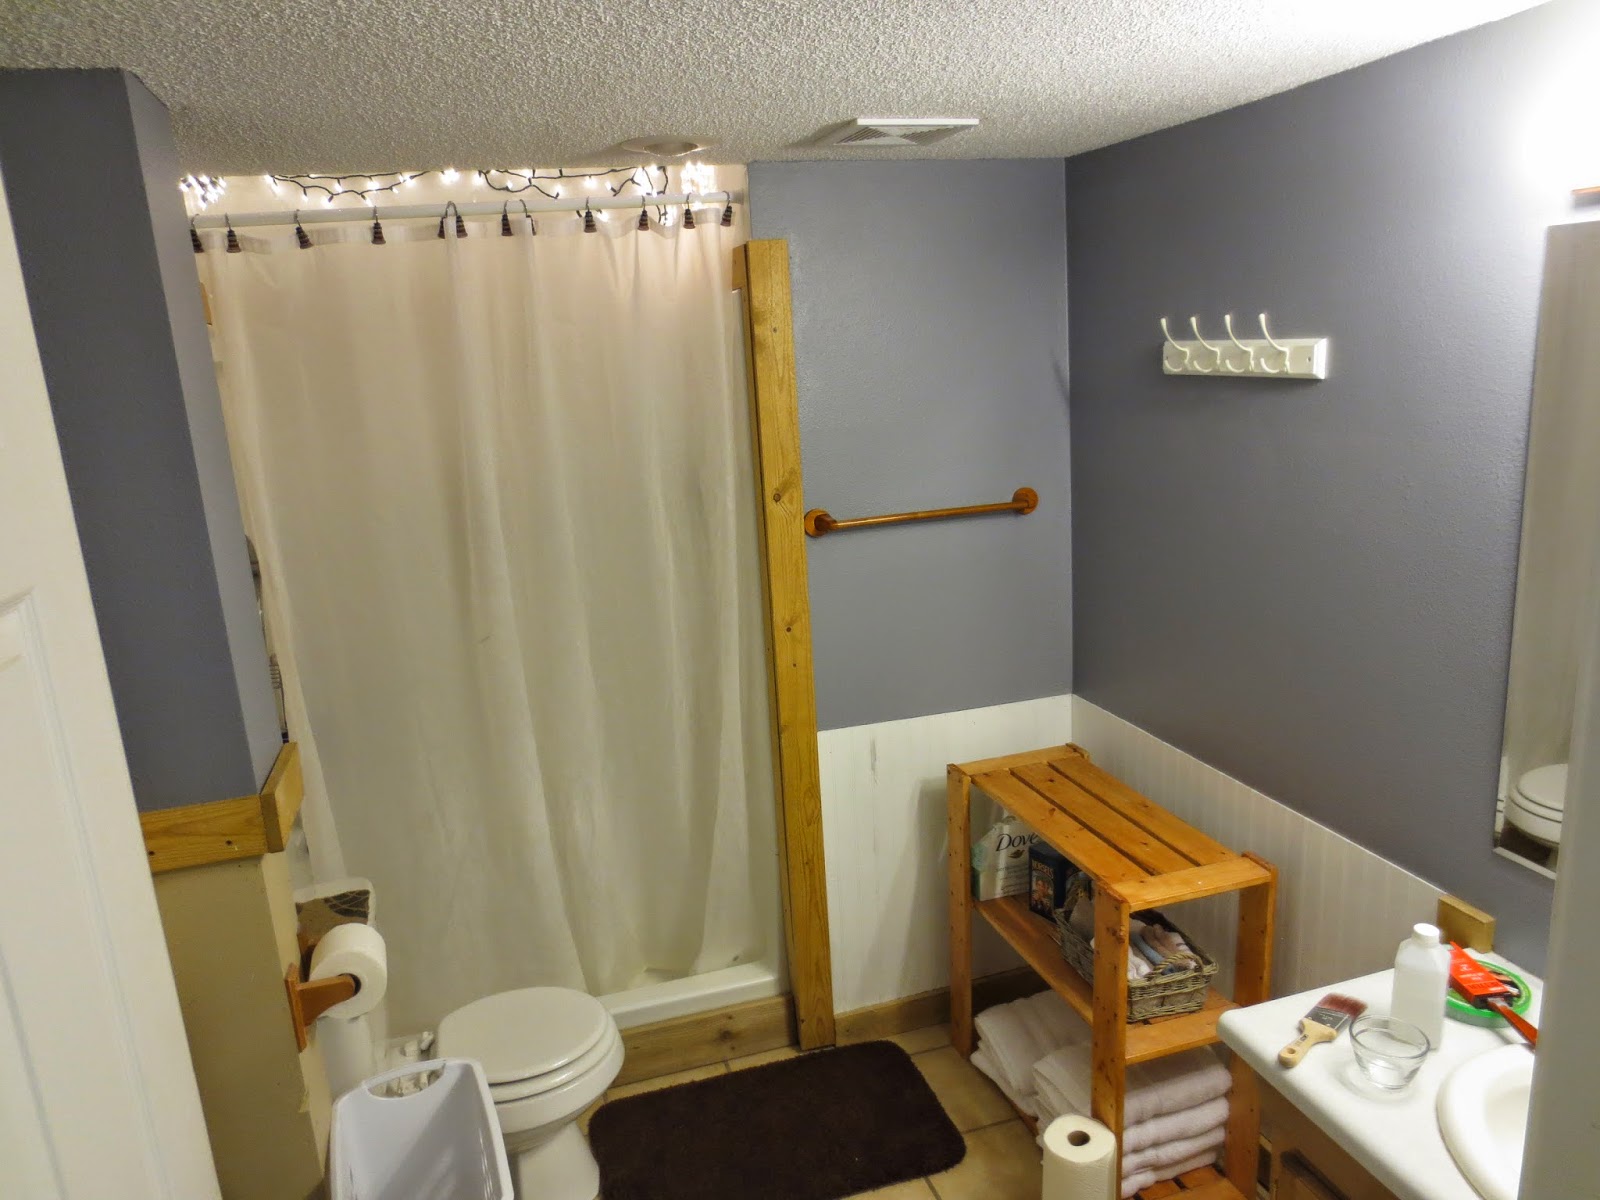
The walls are a little darker than the photos, and the whole room is so gorgeous now! I'm not entirely sure how I'll redecorate. I feel less need to cover the walls, now. :-)

There you have it, my latest little project! 
Sometimes, whims take you in the best directions!

28 June, 2013

Girl's Room, Revisited

 I finally got a couple of things done in the girls' room!
Okay, by "finally" I mean that ever since Olivia was born, I've wanted to get her name print up. So, "finally" as in, "not even four months".
I'll get to the print a little later, though.
The one big thing I haven't been satisfied with are the curtains.
What was in there was a simple white liner from the old purple curtains, and I sort of tacked on a pink ruffly thingamabob.


 Can we all agree they were sort of blah?
Okay, maybe it's just me and my brain. 
I really have a hard time leaving things one way for too long.
(My husband has learned this very thoroughly.)

So, I started looking at curtain ideas and came across these from Pottery Barn Kids:

But OOF-DAH! $90 for a curtain panel?
My brain kicked into gear.

I had two goals:
1: Make ruffly curtains on the cheap.
2: Make one curtain fit perfectly on the single odd-sized window.

All started well. It was cheap because my white fabric was in a bundle, given to me for free.
(Love free stuff.)
I measured very carefully so I had perfectly sized, perfectly customized window coverings.
Then I cut strips for ruffles, and started working from the bottom up.
I pinned the edges first, then eyeballed my way toward center.
Yes, I did repin this at least once.
I also probably called it stupid more than once. (Don't tell my kids.)


 Once I had it fairly well pinned I stitched it down and sort of shoved the loose fabric into bunches as I went.
It worked pretty well, and I got two lovely rows on 3 curtain panels.

Then a few things happened:
1: I ran out of fabric for more uniform ruffles.
2: I have 3 small children that make it...um...complicated...to get projects done.
3: I actually really liked just 2 ruffles.

So, here is how they look now:

 Can you imagine those slathered in ruffles?
It might still happen, but I have so many options!
Finish in white ruffles, do an ombre of pink shades, or just put some lovely pink trim along the existing ruffles and call it lovely. 
(Whatever I do, I got a whole lot of "wow", "pretty" and "OOOH" from my girls over them!)

So anyway, here is what they look like:


 And here's the updated wall:
So, between butterflies and ruffly curtains, I'm keeping it totally girlie.

 In case you're wondering, that teal paint for the frames is my own cocktail of colors.
I typically get inexpensive frames from someplace like Walmart, so then if anything gets knocked down and broken I'm not out a chunk of change. (and yes, I have hung things as securely as possible because I also take the safety of my children into consideration. Thank you.)


22 April, 2013

Pinterest Project

 I had a remnant of wax left from a candle.
It was a Bath & Body Works candle, and so the glass holder was nice, and durable.
(And if I spent a bit more money than I usually do on the candle, why not keep a pretty jar that would be perfect for cute odds and ends somewhere?)

Here is the candle:
(Paired with my does-not-photograph-well hand for size comparison.)

I came across an idea on Pinterest for removing wax.
Kim, writing at Yellow Brick Home, shared her method for removing wax from her candles.

Here is my try, using her method:

Pour boiling water into the candle.
The wax will melt and begin floating to the top.
Let the water cool. The wax on top will harden and can be taken out of the jar. (Don't pour the water down the drain until it's completely cool, so the drain doesn't clog with wax!)
 The remaining wax is soft, and easily removed. (I just dug it out with a paper towel.)

 Soap and hot water remove the final residue.
I don't have an after photo...sorry!
But this little jar is squeaky clean and ready to use.

So, success from Pinterest! Yay!